Guides
How to convert a hand drawing into a 3D model using AI, step by step
Turn a pencil sketch or canvas drawing into a textured 3D model with AI. A real walkthrough with screenshots, timings, mesh stats and fixes.
4 min read

Quick answer
How do you convert a hand drawing into a 3D model with AI?
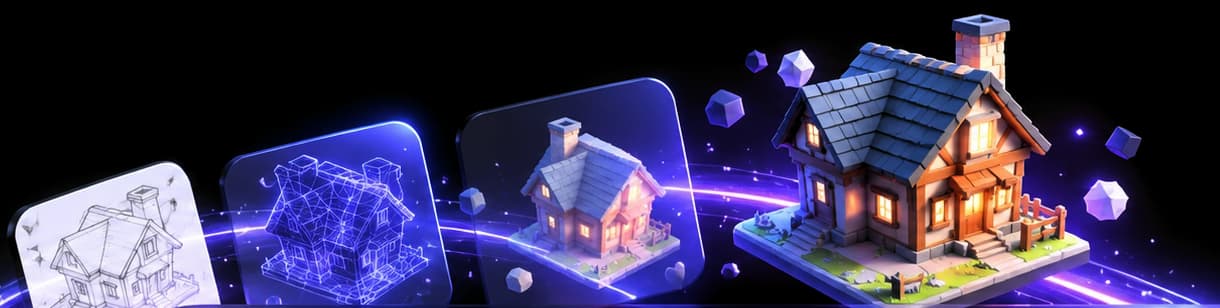
Photograph or scan the drawing, or draw it straight onto a browser canvas. Add a short description of the object and let the AI render it as a shaded image. Check that image, then generate the 3D model from it. Inspect the mesh in wireframe and export it as GLB, FBX or OBJ for your software.
At a glance
| Method | Best for | Watch out for |
|---|---|---|
| Draw on the Vi3W canvas | Quick ideas, mouse or pen tablet | Mouse lines are wobbly; keep shapes simple |
| Phone photo of paper | Pencil or ink sketches you already have | Shadows, paper texture and perspective skew |
| Scan or export from a drawing app | Clean line art from Procreate, Krita or a scanner | Very thin lines can disappear when the image is resized |
What you need
- A drawing of one object. Paper, a drawing app or the Vi3W canvas all work.
- A browser (Chrome, Firefox or Edge). Nothing to install, and the generation runs on Vi3W's servers, not your graphics card.
- A free Vi3W account. Sign-up gives you 100 XP, and one model with the default settings costs 30 XP.
Everything below was done on November 9, 2026, with a drawing made in about a minute with a mouse. The screenshots are from that run.
Step 1: Draw the object, not the scene
Our drawing was deliberately rough: a box, a curved lid, a perspective side, two bands, two plank lines and a lock. Things that helped:
- A three-quarter view. One front face and one side tell the AI the object's depth.
- Closed outlines. A gap in the outline can be read as a hole.
- No shading, no labels. Arrows and notes get modelled as geometry.
If you are drawing on paper, use a dark pen or go over the pencil, and take the photo straight on in even light. A faint grey line on cream paper is the most common reason an upload "isn't recognised".
Step 2: Describe it in a few words
Type what the object is into the prompt bar. We used "A wooden treasure chest with iron bands and a lock". The words set the material and style. The drawing sets the shape. Without the words, a box with a curved top could be a bread bin.
Step 3: Generate the image and check it
Press Generate. Vi3W renders your drawing into a full-colour image with Nano Banana. Ours took 17 seconds. This is the step most people skip on other tools, and the one that saves the most time. Ask yourself:
- Is it the object you meant, from the angle you drew?
- Are the proportions right? Is the lid the right height?
- Is anything added that you didn't draw?
If the answer is no, redraw the part that was misread or change the words, and generate again. An image costs 10 XP. A wrong 3D model costs more.
Step 4: Generate the 3D model
Go to Image Gen, choose the 3D model and press Generate 3D. TRELLIS is the default and the cheapest. Vi3W removes the image background automatically before handing it over. Our chest arrived about 35 seconds later.
If the back or sides matter, add a side view (upload one or use Generate Views) before this step. A single front image means the AI invents everything it can't see.
Step 5: Look at the mesh, not just the texture
The 3D Gen tab has four views: Textured, Solid, Wireframe and Normal. Spin the model in each one.
- Solid shows shape problems a nice texture hides.
- Wireframe shows the topology. Raw AI output is dense triangles. Ours was 32,210 triangles and 23,149 vertices.
- Normal shows bumps and seams as colour.
Step 6: Export to where you work
Download the model as GLB for the web, Godot or three.js, FBX for Unity and Unreal, or OBJ for Blender and slicers. Vi3W retopologises the mesh before export, so it is lighter and easier to edit than the raw triangles above.
Next steps depend on the destination: Blender, Unity, Unreal Engine or 3D printing.
When the result is wrong
- It's the wrong object. Change the words before you change the drawing.
- It's flat or squashed. Draw a perspective view, or add a side view.
- Thin parts are missing. Thicken handles, straps and legs in the drawing. AI models lose anything thinner than a few pixels.
- The back is nonsense. Generate or upload a back view.
- It needs to move. Vi3W makes static meshes. Rig it afterwards (how).
Try it with your own drawing
Open Vi3W, draw one object or upload a photo of your sketchbook, and follow the six steps. The free XP covers about three complete models.
Frequently asked questions
Is there an AI website that turns pencil drawings into 3D models?
Yes. Vi3W runs in the browser: upload a photo of the pencil drawing, describe it in a few words, and it renders an image and then a 3D model. Meshy and 3D AI Studio also accept sketches. Darken faint pencil lines before you upload so they survive.
I want to draw something on a canvas and turn it into a 3D model. What tools can I use?
Vi3W has the canvas built in: draw with the brush, press Generate, and the same tab takes you from drawing to image to 3D model. Most other tools expect you to draw elsewhere and upload the file.
Last reviewed