Guides
How do you make 3D models in Roblox Studio?
Make 3D models in Roblox Studio with Parts, Union and Negate, procedural models, Assistant's mesh generation, or by importing meshes. Steps and limits.
 Aman Porwal on LinkedIn (opens in a new tab)Founder @ Vi3W
7 min read

Quick answer
How do you make 3D models in Roblox Studio?
Build from Parts: insert blocks, spheres, wedges and cylinders from the Home or Model tab, shape them with Move, Scale and Rotate, then group them into a Model with Ctrl+G or Cmd+G. Use Union and Negate for curved or cut shapes, Assistant's /generate_mesh for AI meshes, and the 3D Importer for models made in Blender or other tools.
How do you make 3D models in Roblox Studio?
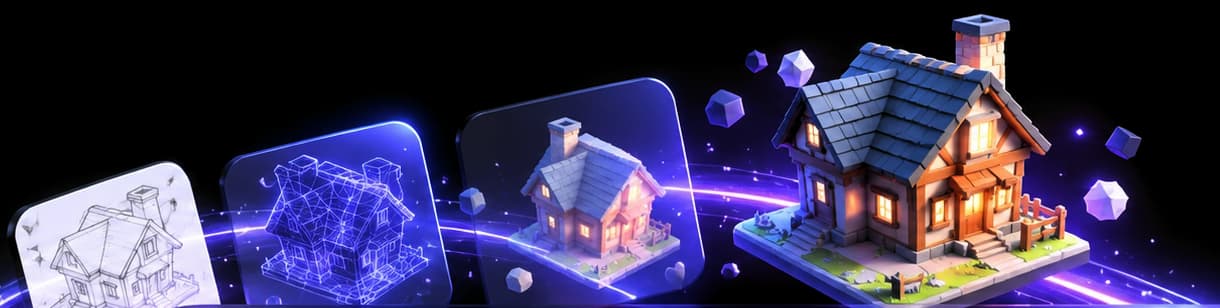
You make 3D models in Roblox Studio in one of five ways, from simplest to most flexible:
- Build from Parts, Studio's basic shapes.
- Combine Parts with solid modeling: Union, Intersect, Negate.
- Make a procedural model that rebuilds itself from parameters.
- Generate a mesh with Assistant, from text or an image.
- Import a mesh made in Blender or an AI 3D generator.
Studio itself is a building tool, not a sculpting or polygon-modelling tool. You can't push individual vertices around the way you would in Blender. That's why the last two options exist. If you're weighing the two programs, Roblox Studio vs Blender compares them.
1. Build a model from Parts
Parts are the building blocks of every classic Roblox build (Parts docs). There are five basic types: Block, Sphere, Cylinder, Wedge and Corner Wedge.
- On the Home or Model tab, click Part. Click and hold the small arrow on the button to pick a type other than Block.
- Shape it with the transform tools: Move (
2), Scale (3) and Rotate (4). HoldShiftwhile dragging to toggle snapping.CtrlR(⌘R) rotates 90° around Y. - Set Color and Material from the toolbar, or apply a custom material from the Material Manager.
- Anchor each part (
AltA, or⌥Aon Mac). Roblox says to anchor most parts, or gravity moves them as soon as the game runs. - Select every part and press
CtrlG(⌘G) to Group them into a Model.
A cottage, for example, is a Block floor, four thin Blocks for walls, two Wedges for the roof and a Cylinder chimney. For techniques that make part builds look less blocky, see Roblox Studio building tips.
2. Combine and cut shapes with solid modeling
When Parts alone can't make the shape, use the solid modeling tools on the Model tab (solid modeling):
- Union (
ShiftCtrlG, orShift⌘G) joins parts into one solid. - Intersect (
ShiftCtrlI) keeps only where parts overlap. - Negate (
ShiftCtrlN) marks a part as a cutter. Union it with another part to subtract it. That's how you cut a door or window into a wall. - Separate (
ShiftCtrlU) breaks a union back into its parts.
Two limits matter. A result over 20,000 triangles is simplified to 20,000, and if that can't be done, the operation fails. Booleans on meshes, plus sweep and fragment operations, need the Solid Modeling On Meshes beta under File ⟩ Beta Features. Unions also carry a performance cost if you overuse them. Roblox unions vs meshes explains when to convert.

3. Make a procedural model
A ProceduralModel is a model driven by a generator module and attributes. Change an attribute, such as the step count on a spiral staircase, or resize the model, and it regenerates. Roblox's example is a table that adds chairs as it gets longer.
You can insert a ProceduralModel object from the Explorer, which includes a template generator script, generate one with Assistant's /generate_procedural_model, or insert one from the Creator Store. It's the right choice for things you need in many sizes: fences, stairs, shelving. It needs some Luau to write your own.
4. Generate a mesh with Assistant
Studio's Assistant can make a model for you:
/generate_meshfollowed by a prompt, such as/generate_mesh a red buggy with knobby tires. You can use a reference image instead of text, not both. An optional maximum triangle count, 10,000 by default, keeps it light. Lower values look more low-poly./generate_procedural_modelbuilds the object from parts. You can generate up to 50 procedural models in a rolling 24 hours.- Segmentation splits a generated model into up to eight named parts before generation, so you can give the wheels and body different materials or scripts.
/segment_meshdoes the same for imported meshes, in early preview.
Assistant shows four previews when you segment, and you pick one. Results vary between runs, so generate a few and keep the best. Full details are in our Roblox mesh generation guide.
5. Import a model made elsewhere
For curved, detailed or textured objects, model them outside Studio and import. The 3D Importer takes FBX, OBJ and glTF files, including PBR textures and rigs:
- Choose File ⟩ Import 3D and pick your file.
- Check the preview. The Importer flags problems and rejects meshes with errors.
- Check Scale Unit, which defaults to Studs, so the model arrives the right size.
- Click Import. The model appears as a Model containing MeshParts.
Each mesh can have up to 20,000 triangles, per Roblox's mesh specifications. Settings, scale and textures are covered in import 3D models into Roblox Studio, and the Blender side in Blender to Roblox Studio.
Which method should you use?
- Parts: fastest to learn, easy to edit later, great for buildings, obbies and blocky styles. Poor at curves and organic shapes.
- Unions: good for holes, arches and simple curved forms. Can get heavy, and harder to edit.
- Procedural models: best for objects you need in many sizes. Requires scripting for custom ones.
- Assistant generation: quickest route to an organic prop, right in your place. Less control over the exact shape and the mesh.
- Imported meshes: most control over shape, triangles and textures. Needs outside software and an export step.
Most games mix them: Parts for the level, imported or generated meshes for props.
Things that trip up beginners
- Unanchored builds fall apart when you press Play. Anchor them, or weld them if they need to move.
- Grouping isn't welding. A Model keeps parts together in the Explorer, not in physics.
- Too many tiny parts add up. If a decoration has hundreds of parts, a single mesh is usually cheaper.
- Imports that arrive huge or tiny almost always have the wrong Scale Unit. See Roblox studs to meters.
- Free models can carry scripts you didn't write. Check anything from the Creator Store before you ship it.
Making the meshes for step 5
If you can't model in Blender yet, an AI 3D generator can produce the mesh for step 5. Vi3W turns a text prompt, photo or sketch into a textured model, retopologises it from high poly to low poly, and exports GLB, FBX or OBJ for the Importer. It doesn't work inside Studio, rig characters or build whole scenes, so you still assemble and script the game in Studio. Make a model in Vi3W, and see Roblox 3D models for how meshes and Parts work together.
Frequently asked questions
how to make 3d models in roblox studio
Insert Parts from the Home or Model tab, shape them with the Move (2), Scale (3) and Rotate (4) tools, anchor them, and group them into a Model with Ctrl G (⌘ G on Mac). Combine or cut shapes with Union and Negate on the Model tab. For organic shapes, generate a mesh with Assistant's /generate_mesh or import one made elsewhere with File ⟩ Import 3D.
Last reviewed