Materials
UV mapping
The process of flattening a 3D model's surface into a 2D layout so a texture image can be wrapped onto it.
- #materials
- #texturing
- #pbr-materials
- #retopology
Quick answer
What is UV mapping?
The process of flattening a 3D model's surface into a 2D layout so a texture image can be wrapped onto it. Each vertex gets a coordinate, U horizontally and V vertically, that says which pixel of the texture it shows. Cuts called seams decide where the surface is split open, much like unfolding a cardboard box.
Why models need UVs
A texture is a flat image. A model is a closed surface in three dimensions. UV coordinates are the bridge: every vertex stores a 2D position on the texture, and the renderer interpolates between them to decide which pixel lands on each point of the surface. The letters U and V are used simply because X, Y and Z are already taken by the model's position.
Without UVs a texture has nowhere to go. Procedural materials and box projection can fake it for concept work, but anything that needs a baked normal map, a painted texture or a game-engine material needs a proper UV layout.
Seams and islands
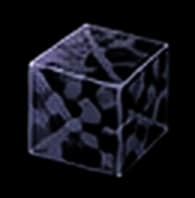
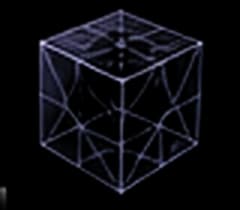
To flatten a closed shape, you have to cut it. The cuts are seams, and each separate flattened piece is a UV island. A cube unwrapped along seven of its edges becomes the familiar cross of six squares.
Where you place seams is the main skill in unwrapping:
- Hide them. Put seams where the eye rarely looks: under arms, along the back of a character, at natural material boundaries.
- Follow hard edges. On hard-surface models, cut along sharp edges where the shading already breaks.
- Balance cuts against stretching. Too few seams and the texture stretches as the surface is forced flat. Too many and you get dozens of tiny islands, each with a visible edge.
Texel density and stretching
Texel density is how many texture pixels cover each unit of surface. If one wall's island is twice the size of another in UV space, its texture shows twice the detail. Mismatched density is what makes tiles, bricks or fabric weave change size across a model. Keeping density consistent across a model, and across a whole game scene, is what makes assets look like they belong together.
Stretching is the other common fault. When an island is distorted during flattening, square texture pixels become long rectangles on the surface. A checker texture shows it instantly: every square should stay square.
UVs for game engines
Game engines add two practical requirements. First, every UV seam splits vertices, because a vertex can only hold one UV coordinate, so careless seams raise the real vertex count. Second, engines that bake lighting often need a second UV channel for lightmaps, with no overlapping islands. Godot's documentation, for example, notes that the OBJ format cannot carry a second UV channel at all, which is one reason glTF and FBX are preferred for game assets.
Clean geometry makes all of this easier. A mesh with tidy quad topology has clear edge loops to cut along, which is one more reason retopology comes before unwrapping in most pipelines.
UV mapping in Vi3W
Vi3W models arrive textured, with UVs and PBR maps already in the export, so they render correctly the moment you import them. If you plan to repaint an asset in Substance Painter or Blender, check its UV layout against your texel-density target first. The sketch-to-3D page lists the export formats.
Frequently asked questions
UV Mapping, how to get tiles from Map on all walls in the same size?
Give every wall the same texel density: the same number of texture pixels per metre. After unwrapping, scale each UV island so its size in the UV editor matches its real size on the model. Blender's Average Island Scale does this in one step, provided the object's scale is applied first. Then the tiles come out the same size everywhere.
How to remove texture seam's artifact?
Visible seams usually come from two things: texture colours that do not match across the cut, and too little padding around each UV island. Add a few pixels of margin (bleed) when baking or exporting, so mipmapped textures do not sample the background. Then paint across the seam in 3D, for example in Blender's Texture Paint mode, so both sides match.
Smart UV seams from hard/split edges?
Yes, you can do it without a script. In Blender's Edit Mode, use Select → Select Sharp Edges, or select the edges you have marked sharp, then Edge → Mark Seam, and unwrap. Hard edges are natural seam candidates anyway: a hard edge already splits the vertex normals there, so cutting the UVs in the same place adds no extra vertices in a game engine.
Related terms
- PBR materialsSurface descriptions built on physically based rendering, which models how real light reflects off real surfaces.
- RetopologyRetopology is the process of rebuilding a 3D model's surface with a new, cleaner polygon layout while keeping its shape.
- Quad topologyA way of building a polygon mesh almost entirely from four-sided faces arranged in continuous rows called edge loops.
Sources & further reading
From text to 3D
Create 3D models with AI in seconds.
Turn ideas into game-ready 3D models from text, a sketch or an image. No complex software — it all runs in your browser.

Last reviewed